Switching to Linux is one of the best decisions you can make for your computer — but knowing where to start is another matter entirely. This book is your guide through that transition, written by Jay LaCroix, creator of the Learn Linux TV YouTube channel, with over a decade of experience helping people make Linux approachable.
Whether you’re fed up with Windows nudging you toward Microsoft Edge or Apple prompting you to sign in to yet another account, Linux offers a computing experience designed to work for you, not against you. You’ll learn everything you’ll need to know — from understanding what Linux actually is, to choosing a distribution, installing it, and using it confidently day to day.
By the end, you won’t just have Linux running on your computer. You’ll understand it!
Do you actually know how fast your network is? Not what your switch spec sheet says — what it’s really doing between two hosts. iPerf3 is the tool sysadmins and homelab enthusiasts reach for when they need real answers, and in this video I’ll show you how to use it from the ground up.
We cover everything from installation to practical usage, including how to test WiFi vs wired, push a 10 gigabit ethernet connection, bind to a specific interface, and dial in your test parameters for accurate results.
If you’ve ever rebooted a Linux server and had it fail to come back up, there’s a good chance the culprit is sitting right in your /etc/fstab file. Device names like /dev/sda1 can shift after a reboot, a drive swap, or even a kernel update — and when that happens, your mounts break and your server may not boot at all. In this video, I break down why UUIDs matter for Linux storage, and I show you a real production server that ran into exactly this problem.
Manually spinning up VMs in Proxmox gets old fast. In this video, I’m using Kestra (an open-source workflow automation platform) to automatically clone a VM template and start it, all without touching the Proxmox UI! You’ll see the process of buiding the workflow, setting up the Proxmox API – and more! In this step-by-step video, you’ll be able to build this for yourself.
Thanks to Kestra for supporting this tutorial! You can self-host it and use it to automate entire workflows , so check it out!
Thinking about gaming on Linux but not sure where to start? In this video, I walk through the entire Linux gaming landscape — from choosing the right GPU, to picking a gaming-friendly distro, to running your games through Steam, Proton, Lutris, GOG, and CrossOver. This isn’t a deep tutorial on any one tool — it’s a practical overview and set of tips to help you navigate Linux gaming with confidence, whether you’re switching over or just curious.
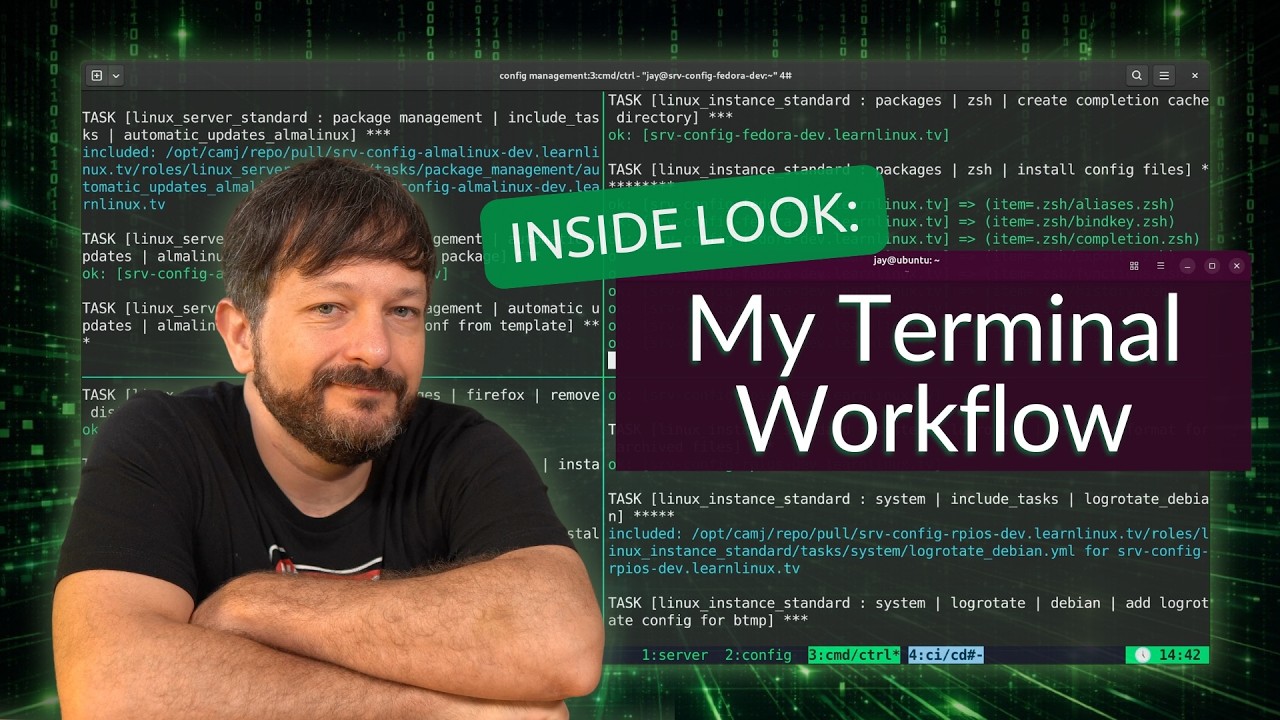
Your terminal setup says a lot about your workflow – in this video, I walk through how I configure my Linux terminal environment, covering tmux, Vim, my Bash configuration, and even a live Ansible provisioning run to deploy this setup across my LLTV servers.
If you’re looking to build a faster, more efficient terminal workflow on Linux, this video covers the core tools I rely on every day as a sysadmin.
What does hacking really look like – and how do attackers actually break into systems? In this video, I sit down with Casey Erdmann, Red Team Engineer and author of Red Team Engineering, to pull back the curtain on how real-world cyberattacks work, what cybersecurity is actually like to learn, and what most people get completely wrong about hacking.
In this video, I’m taking a close look at the Acemagic Retro X5 — a retro-themed mini PC that combines nostalgic console-inspired design with modern hardware. Is it all looks, or does it actually deliver on performance? Let’s find out.
Looking for a modern Virtual Desktop Infrastructure (VDI) solution that’s easier to deploy, scale, and manage? In this video, I’ll show you how to set up Kasm Workspaces with Proxmox VE and take advantage of Kasm’s powerful autoscaling capabilities to automatically provision virtual machines on demand.
We’ll begin by exploring what Kasm is, how it differs from traditional VDI solutions, and why organizations are increasingly turning to containerized and browser-based workspaces for remote access, development environments, application delivery, and secure desktop access. I’ll also explain the fundamentals of Virtual Desktop Infrastructure (VDI) and discuss the benefits Kasm can bring to enterprise IT environments.
From there, we’ll walk through the Kasm platform, launch several example workspaces, and then dive into the process of implementing autoscaling with Proxmox VE. By the end of this tutorial, you’ll understand how Kasm can automatically create and manage virtual machines when users request new workspaces, making it possible to build a highly scalable self-hosted VDI platform.
In this video, I’ll walk you through the essential first steps you should take every time you deploy a new Linux server. Whether you’re a seasoned sysadmin or just getting started with Linux server administration, these foundational steps will help you secure your server, set up SSH key authentication, and establish a solid baseline configuration.
Ever wonder what actually happens behind the scenes when I spin up a new server or workstation? In this video, I’m giving you a behind-the-scenes look at my full deployment workflow — covering how I provision cloud VPS servers, configure them with Ansible, deploy workstations, and manage it all through a consistent configuration management approach.
Ansible is a key piece of this puzzle, but this video is really about the bigger picture: how all the pieces fit together to make server and workstation deployment fast, repeatable, and low-maintenance.
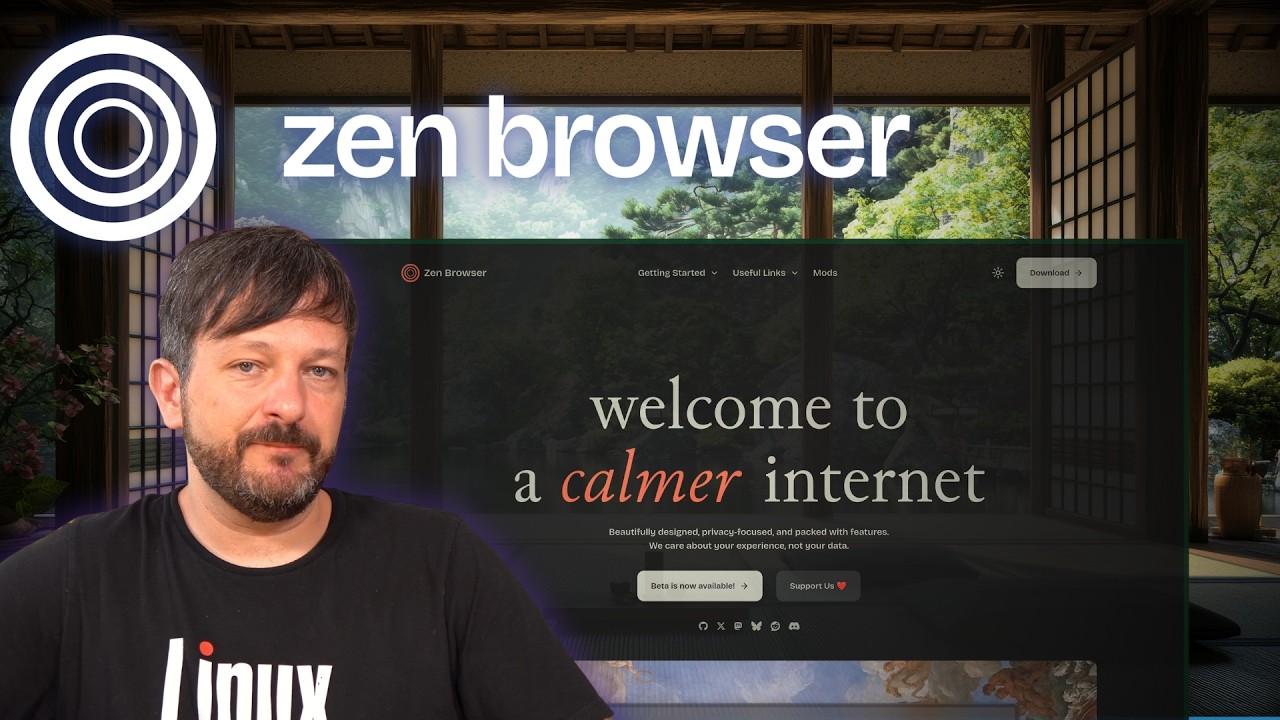
Have you been looking for a better browser than Firefox? In this video, I take a deep dive into Zen Browser, a fast-growing Firefox-based browser that’s been gaining attention from Linux users, privacy enthusiasts, and power users alike.
We’ll take a detailed look at Zen Browser’s features, including Workspaces, Spaces, Split View, Glance, tab organization, and other productivity enhancements that help it stand out from traditional web browsers. I’ll also discuss some of the challenges Firefox has faced in recent years, Mozilla’s controversies, the impact of Google’s Manifest V3 changes, and why many users are searching for alternatives in the first place.